Getting started with 24V tiles (MASTER has the Controller connection)
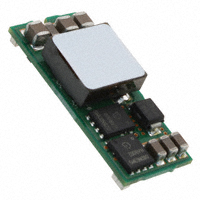
*NOTE TO BACKERS* If you received a kit with both Master and Basic tiles, then all of your tiles will run from 20 – 30 volts. There is a power conditioner on the back that looks like the image below, if you don’t have this, you have a 5v tile. You can also look at where the power cable enters the board and there is a voltage label next to the red power line.
The only difference between a Master and the others is one of them has a latch and a header for connecting the ethernet controller.
POWER
You will need a power supply that is capable of 24 volts DC at at least 2 amps (48 watts per tile). This is a robust option, but will require some simple soldering to connect it to the provided XT60 DC power connector. Instructions here.
24V DC 15A 360W Regulated Switching Power Supply for LED Strip Light
This next one will require less wiring and will work for 1 or 2 tiles. You can choose either 2 or 5 amps, and has an option for international AC wall plugs.
wholesale DC 24V 1A 2A 3A 5A Adapter power supply Transformer for led strip
This adaptor will make it easier to connect to the above power supply.
10 Pack 2.1mm x 5.5mm Female DC Power Jack Adapter Plug for LED Strip Light
You will also need a router and an ethernet cable. Plug the ethernet controller into the back of the tile, then connect the ethernet cable between the router and the controller. Make sure your computer is on the same wifi or wired network as the tile. The tile will turn all RED when its powered up, then all GREEN once it has established a DHCP network connection.
You can download and run the Pixel Plane Driver app. Click “search for controllers” and your tile should show up and display its IP address and MAC address.
Getting started with a 5V Basic tile (no controller included)
We will be updating this page with better tutorials in the coming weeks. For now, here is some very bare-bones information for folks that don’t mind a little hacking.
The first step is to power it. The driver chips and LEDs all run off 5 volts. DO NOT RUN ANY VOLTAGE HIGHER, or it will permanently damage the WS2803 chips. (They will actually explode, I tested this.)
The board can draw a maximum of 8 Amps at 5v, this is more than can be routed through a microcontroller like the Arduino, so we power the tile separately. Here are some example 5 volt DC power adaptors. You can also power the tile using a LIPO battery using the provided XT60 connector.
This adaptor will make it easier to connect to the above power supply.
This one is a little cheaper, but requires more wiring.
AC110/220V to DC5V 10A 50W Driver Switch Power Supply Transformer for LED Light
Sending serial commands:
If you are using an Arduino, you can use this library from Adafruit, its for the WS2801 but should still work for the 2803, the main difference is there are 18 channels instead of 3.
https://github.com/adafruit/Adafruit-WS2801-Library
based on this tutorial: https://learn.adafruit.com/12mm-led-pixels
Here is a Node.js library for RaspberryPi.
https://www.npmjs.com/package/rpi-ws2801
Download the schematics of the PixelPlane circuit board:
The tile uses 3 separate serial lines, so you need to provide 3 clock and 3 data feeds. Here is the data sheet for the latest WS2803, the pinouts changed late 2014.
Here is some additional information about the WS2803 chip.
http://thomasolson.com/PROJECTS/WS2803_Testing/